Showing posts with label remodel. Show all posts

Monday, August 22, 2011

Mudroom - Then and Now

A while back (May to be exact), I showed what we did to update the dining room and asked what room to show next. My sister requested the mudroom, but I showed the kids bathroom next. Then came the family room. I guess maybe now would be as good a time as any to show the mudroom.

When I started writing this post, I realized the mudroom wasn't included in the original before post.  No clue why.

Anywho, here is what it looked like when we had our inpsection.


The previous owner was using it more as a sunroom. As soon as we looked at the house, I saw mudroom. Finally! A place to drop all of our crap without it taking over the rest of house. I couldn't wait!

It had the faux beams that were in the kitchen and the family room. And, below the chair rail was paneling covered with wallpaper, then painted. 

And, here is what it looks like now:


The wall color is Glidden Smooth Stone that we had color matched in Behr's Paint + Primer. Our house is older and the floors aren't nice and flat anymore, so we used a click together tile on the floor. You don't have to put down mortar or backer-board or anything. It goes right over whatever you've got. We went with Avaire tile in Sonoma.  Both the paint and the floor are carried into the kitchen. Sparky and my bro-in-law got most of it cut and put down together, but he did all the grout himself. Which I guessed sucked. In a big way.  The grout is an acrylic grout and dries fast and is really thick and generally just a PITA. (That would be pain in the a@# for those not up on acronyms.)

We liked the look of the chair rail, so decided to put wainscoting backup (it also saved us from "fixing" the walls and painting them). The wainscoting is actually vinyl planks that are two-sided. We used it in the laundry room and they are great. Everything just wipes right off. Like when your 5-year old kicks off his muddy shoes and they hit the wall.

We didn't have anything on the windows for a long time because I couldn't find anything that would fit all three windows that were the same style. I finally found bamboo roman shades I liked at overstock.com. (I heart o.co. Sigh.)

We also wanted a shelf with hooks to hang our up jackets and backpacks, as well as have storage for hats, mittens and all of our other stuff above.


I got the baskets at Michael's for $6 a piece! Score! But, I'm not in love with the shoe situation. I just picked up that rug for $5 at Big Lots. I like the color, but I think we need another one, or a shoe rack on one side. We'll need something different, especially when winter hits and we have shoes and snow boots to deal with.

The church pew I got at an antique mall and probably paid too much for it, but I love it.  Who knew church pews were so hard to come by?

(Obviously, no styling was done before taking this picture. Jackets, bags, backpacks all in a hodge podge. This is pretty much what it looks like all the time. Not very pretty, but it functions.)

We also needed a spot to drop things on our way out to the deck. We had a smaller table there, but it just didn't look right. This is one we picked up at Gordman's. They have a line of furniture made from recycled materials. It fits perfect and I love the way it looks. The art above came from Gordman's. (We don't have HomeGoods stores here and it breaks my heart. Sniff.)


I'm also not a fan of the current garbage/recycling situation. I've been scrounging IKEA's website and keep my eyes peeled whenever I'm at Wally World or Target hoping I'll have an epiphany. So far, nada.


Here's a close up of the side table. So pretty and doesn't look like anything else in our house. I think that's why we like it so much. Sparky is the one that actually found it.


This room (along with all the rest in the house) is a work in progress, but it's already come a long way!

Here's one last before and after.


Todo:
Family pictures/subway art above the church pew
New garbage/recycling cans/containers
Replace big metal flower with a fun bright colored clock
Possibly replace rug going out to the deck
Curtain on deck door to soften up the room?

Linking up with:

Sunday, July 24, 2011

Dingy Storage Room to Colorful Playroom

When we bought our house our plan for the lowest level was a craft room for me and a man cave for my husband.  I’ve dreamed of having a space to call my own. Where I could leave my crap projects out and organize all my goodies.   Sparky had a poker room in our first house and really missed it.

Well, after living here for three months. We changed our minds.  The kids’ rooms are pretty small and our family room was being overrun with matchbox cars, trains (and their tracks) and blocks.  We couldn’t take it anymore.

So, my husband decided to give up his man cave and give the kids a playroom.

I’d been using the side that was to be the man cave as a crafting area and the other room was being used for storage.   Beware; the pictures to follow are not pretty.  I actually can’t believe I’m showing them at all. But, in order to see how much the room changed in a weekend, it has to be done.
This is going to eventually be my craft room. 


 And this is the storage room.  Holy crap that’s a lot of… well, crap.


First things first, empty the room. You can see the colors we were thinking of going with.  This room is partially finished and that was fine with us. We didn’t plan on truly “finishing” the room. We simply wanted to paint the walls and put down some carpet.  Make it fun a space for the kids to play and make a mess could be easily hidden by shutting the basement door.


One wall did have sheetrock, but it wasn’t taped or anything.  Sparky filled in the screws with spackle, but left the seams alone. The other two walls are concrete. And the plumbing pipe runs across it. The last wall has the furnace and sump-pump.  Once the spackle was dry, it was time to prime. 

We used Killz Latex Primer on the sheetrock and Olympic Masonry Primer on the concrete walls.  RC was very excited about the prospect of getting a playroom and wanted to help paint.


Next up, painting! We knew wanted something playful and fun and bright since it’s a basement room with only two small windows that face north.  The colors we chose were Exotic Sea, Spring Leaves and Pumpkin Burst from Valspar in a Satin finish. 

We decided to paint the majority in Spring Leaves and then use Exotic Sea and Pumpkin Burst for accents.   For the long wall that had the PVC pipe, we decided to paint the pipe the same color as the wall. The far wall became the accent with different sized stripes. We actually used the seams in the cement as our stripes and painted the pipe accordingly.  We also decide to paint the duct work as well. Actually, Sparky decided to paint it and it just adds that little extra something. We aren’t planning on closing in the ceiling and this made it seem more planned and not just plain old duct work.


Three gallons of primer and three gallons of paint later, we were ready for the carpet.  Basements in North Dakota are damp. And sometimes they flood.  We knew we didn’t want to glue any carpet or pad down in the event we did ever get water. Glue pad + wet basement = gross mess.

We also didn’t want to spend a bunch of cash on it.  Solution? Carpet with a built in pad that we just rolled out on the cement.  Sparky cut around the furnace, steps, doorway and trimmed up along two of the walls.


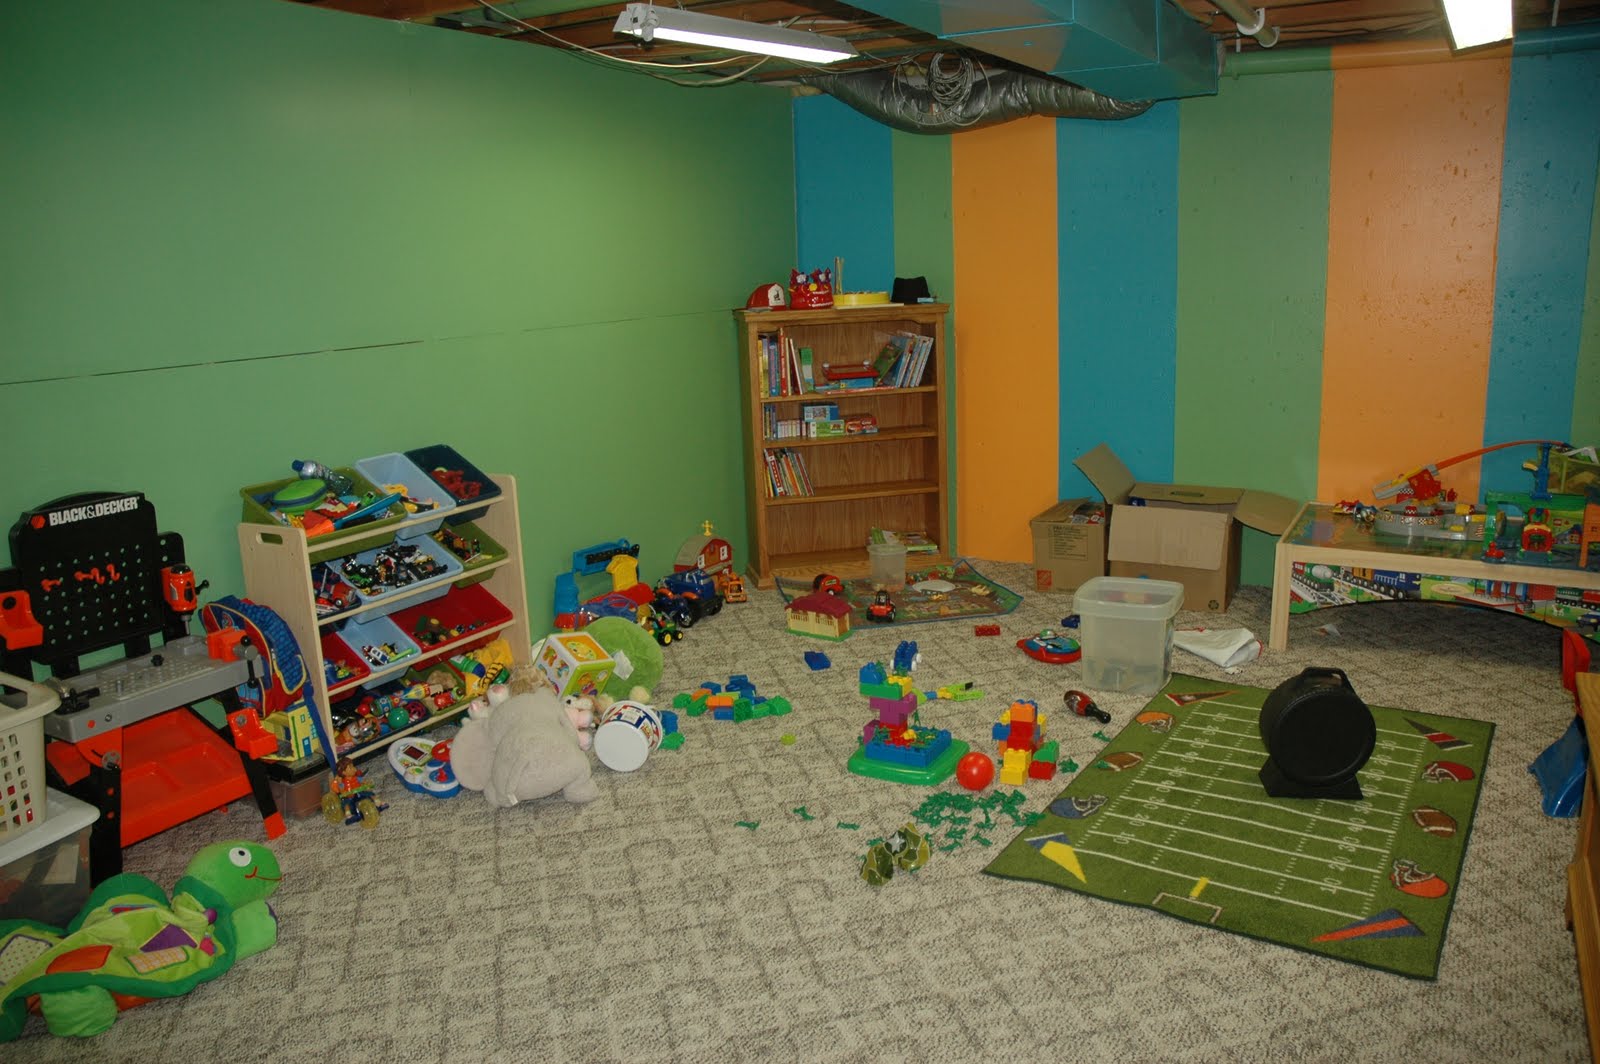
Wow! It looks like an actual room now!  We started priming the walls Saturday afternoon and the kids were playing in it by 5 on Sunday. Not too shabby!

This is how it looked after the kids went to bed. I think they like it. 


We have a list of things that we want to do to the room, but for now it’s exactly what we need! 

Todo list:
Put in door to craft room
Put up some trim and possibly a chair rail
Paint flowers or stencil big circles on the wall
Maybe make the pipe look like snake
Shrink art (saw it on Home by Novogratz and it was awesome!)
Art center – big rolls of craft paper on attached to the wall and art supply organization
Maybe some corkboard
More storage – shelf or cubbies

Nothing major, just finishing touches that are going to make the space more fun and functional.  I've been pinning inspiration like crazy on Pinterest.

Linking up with:

UndertheTableandDreaming


Home Stories A2Z


Blue Cricket Design


Domestically Speaking

Wednesday, February 9, 2011

Kitchen sneak peek!

There's been a lot of work and a lot of progress made on the house! We actually starting painting this weekend. I'm so excited! (You can see some of the befores here.)

One of the biggest transformations though, has been the kitchen. We aren't changing the footprint so much, but everything this else is getting a facelift.

Here's a sneak peek at what we've done so far.

As a reminder, here's what the kitchen looked like when we had our inspection.


So, what have we done? Well, wall paper is gone, beams are gone, light fixtures have been replaced with can lights (LOVE!), and the cabinets on the far end have been removed. We are planning on putting in a pantry of some sort on that end and probably a counter or table to eat breakfast at.


 This past weekend, Sparky (aka, my electrician husband) popped all of the decorative stuff off the front of the cupboard doors. They were glued on and he used a wonder bar (not to be confused with a wonder BRA), and hammer and they popped right off.  Then, he filled them with some putty and sanded them a couple of times.  They are pretty much ready for a new coat of white paint!

He also broke out the saws-all and cut off the little fence thing (so, technical...I know, but that's what it looked like to me).  Such a big difference! LOVE, LOVE, LOVE it! It doesn't even look like the same place. Even with just primer on the walls.


I can't wait to get the lovely gray paint we picked out on the walls and the new tile floor down!